Showing posts with label sewing. Show all posts

Monday, April 21, 2014

Easter Recap

jlkj

This year I got it into my head that I was going to make baskets for the kids.  So the night before Easter, around 11pm, this is what my desk looked like.

002_edited-1

The three baskets took about 3 1/2 hours to make.  I ran out of interfacing and spent a significant chunk of time frantically searching through closets, and miraculously came up with a piece big enough to cut the rest of the squares.

019_edited-1

The butterfly, bird, toadstool, and coordinating polka dot fabrics are all from a collection called Flo’s Garden.  I let my daughters pick which color they wanted before I made them.  The idea is that they can use them in their room when Easter is over.

034_edited-1

I just love how they look all in a row.  The colors are so perfect for spring (and girls)!

We started a new Easter tradition this year.  A few months ago I took Bea and Esther to an estate sale—our first.  We found this bunny basket on a shelf and bought it for $2.  When we got it home we realized there were small egg ornaments wrapped in tissue paper inside.  So we thought we’d have an egg tree this year.

001_edited-1

I asked my hubby to pick up a tree from Lowes that we could plant in the yard after Easter.  He came home with this flowering quince tree.

037_edited-1

The girls hung them all up and we’ve had the tree decorating our front porch the past few weeks.  It’s time we find it a permanent place in the yard.

017_edited-1

How cute is that little blackbird?  Some of the eggs had stickers that said “Made in China,” so they aren’t the priceless heirlooms I was hoping to discover!

I hope everyone had a wonderful Easter!  Tomorrow it’s back to the old routine at our house.  I’m going to miss sleeping past my husband’s alarm clock.

Thursday, March 13, 2014

Linen + Shamrock Table Runner {a tutorial}

1-IMG_6064

You will need:

  • green scraps to make shamrocks
  • 1/4 yard linen
  • 1/4 yard background fabric preferably linen
  • 1/2 yard backing
  • batting scrap at least 11” x 30”
  • fusible web of your choice (I used Lite Steam a Seam 2)

Use a 1/4” seam unless noted.

1.  Download & print the template for the shamrock.  Lindsey Weight of the Fort Worth Fabric Studio blog kindly let me borrow the link.  You will need the smaller template for the table runner.

2.  Trace the template 5 times on fusible web.  Following manufacturer’s directions iron the web to the wrong side of your green scraps.  Cut very carefully around the shapes you traced.

3.  Cut five 5.5” squares from your linen.  Peel off the paper from the back of your shamrocks and arrange them on the squares how you like.  Press them to bond into place on the linen.

4.  Set your stitch length a little longer than the normal 2.5 for piecing.  I set my machine to 3.0.  Straight stitch close to the edge of the shamrocks to permanently stitch on the linen.

5.  Cut five 2” x 5.5” and five 3” x 5.5” rectangles of background fabric.  Arrange your 5.5” squares in a row how you like them.  I alternated the shamrock orientation.  Sew the rectangles onto the top and bottom of your 5.5” squares so that the squares appear to move up and down.

1-IMG_5961

6.  Press all your seams open and you can use some light starch or Magic Sizing to help set those seams open.  I found that the linen seams didn’t stay perfectly flat without a little spritz of Magic Sizing.

1-IMG_5968

7.  Sew your blocks together and press those seams open.  Add a 2” x 9.5” strip to each end of your runner.  Press those seams open, too.

1-IMG_5972

8.  Press your runner really flat.  Now baste it however you prefer to your piece of batting.  I used a little bit of spray adhesive or you could use safety pins. 

9.  I hand quilted big stitches around the perimeter of the center section.  One nice thing about this runner is you don’t need to bury your threads because you are quilting through the top and batting only.

10.  Once your runner is all quilted, square up your runner & batting to approximately 9.5” x 28.5”.  Place right side down on the right side of your backing.

1-IMG_6037

11.  Using straight pins, pin the top/batting to the backing all the way around the perimeter.  Then I used a long ruler and rotary cutter to trim off the excess backing.

12.  Using a walking foot, sew a 3/8” seam around the edge leaving a 2.5” opening for turning your runner.  Clip off the corners making sure not to cut through your stitch line.

1-IMG_6044

13.  Turn right side out.  I used a chopstick to push out the corners of the runner.  Press the opening closed as perfectly as possible so you can’t even tell there’s an opening.  Press the entire runner as flat as possible.

1-IMG_6046

14.  Using the walking foot, sew a 1/8” to 1/4” seam around the edge of the runner. 

That’s it!  Sewing this runner took about 3 hours, including almost an hour to do the handstitching.   Happy St. Patrick’s Day!

Monday, June 18, 2012

See & Sew

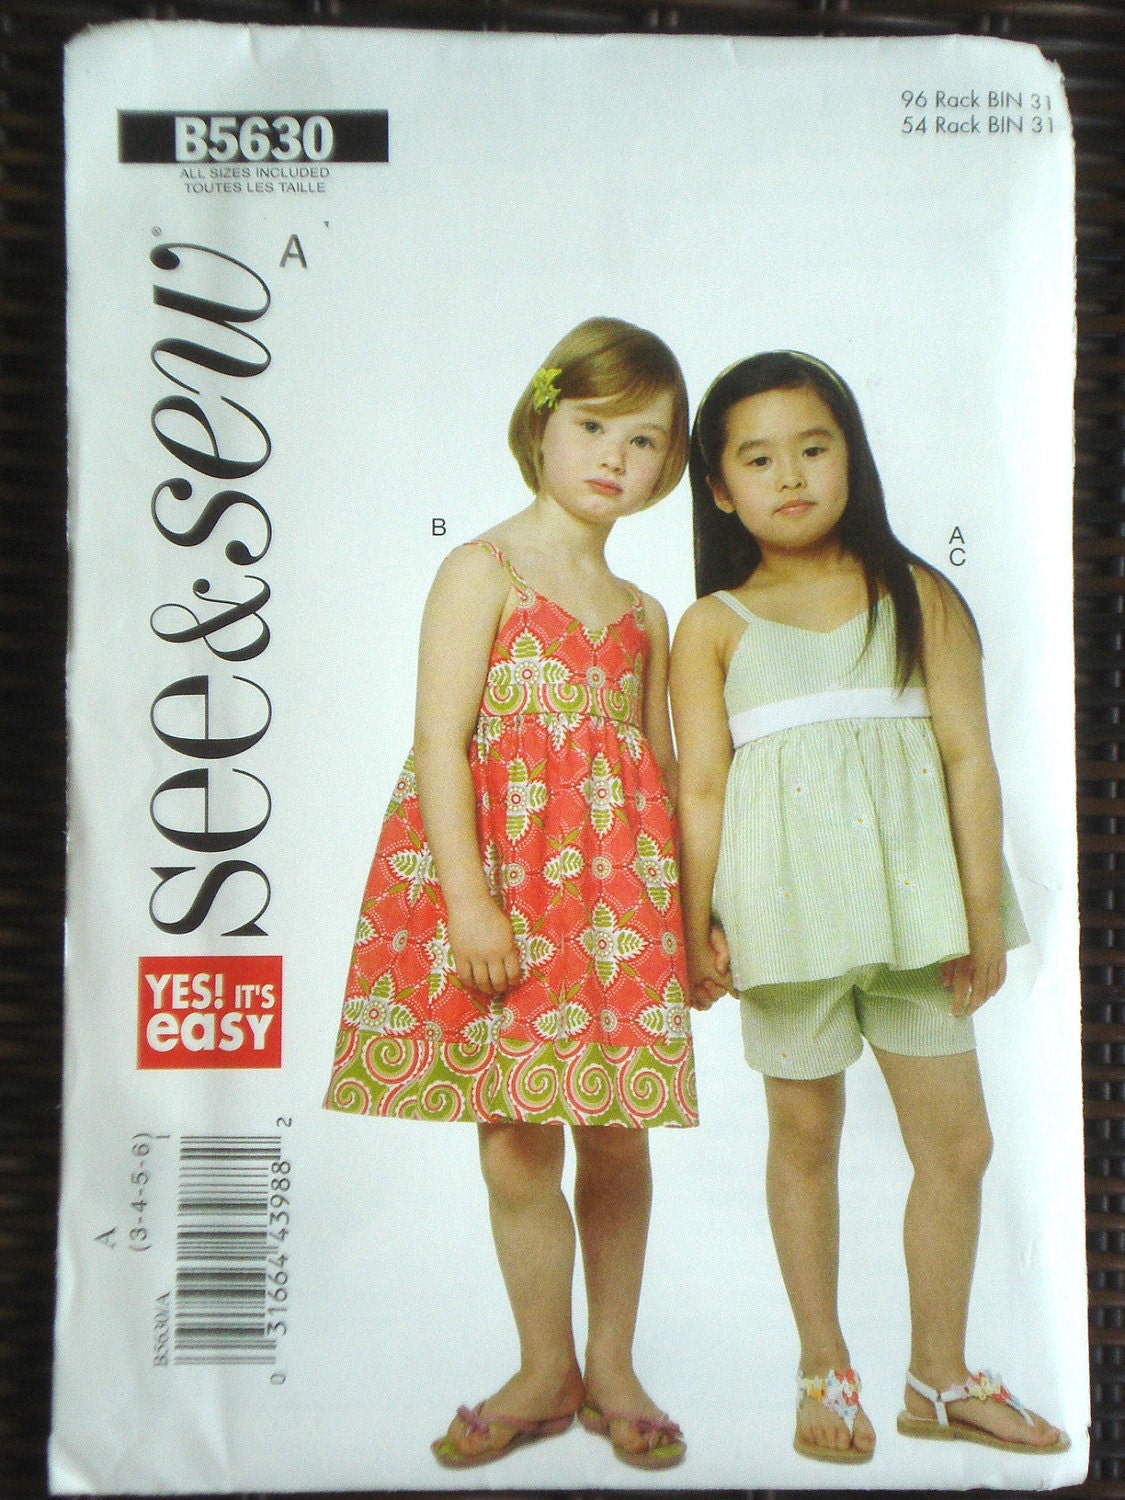
One day last week my daughter was really excited to sew a dress.  She picked out fabric from my stash and drew several designs, not understanding what a pattern actually was.   So, in the excitement of it all, we drove to Joanns to look through the pattern books and she picked out this pattern for her dress:

Butterick See  & Sew sewing pattern Children's Girl's  Dress Top Shorts

The front says “Yes!  It’s Easy” but sometimes I feel like the tissue paper kind of patterns are anything but.  Step 16 literally says, “Turn facing to inside, turning shoulder straps out; press.  Turn under ends of facing to clear zipper teeth SLIPSTITCH to zipper tape.”

Incomprehensible to me since I don’t really have any garment sewing experience.  But, I had about two hours to get the dress sewn.  So, what did I do???

I made it up!  Thank goodness I’ve been sewing long enough to know the rule to sew right sides together.  I just winged it and figured out a way to get the bodice lining sewn to the dress in a relatively unhaphazard way.  The dress looks great from a distance, and pretty good up close.  I omitted the zipper and put about 4 inches of elastic in the back instead.  The dress was done by 10pm and my daughter stayed up late for her “fittings” so I could adjust the elastic and situate the straps, and she happily modeled it for her dad who was mildly impressed.

008

We used coordinating Barbie fabric from Over the Rainbow.

012

Here is the back sans zipper.  I kind of like the elastic better, to tell you the truth, because she can get herself dressed without my help.

015

My first love is definitely quilting, but sewing the occasional dress is fun, especially if it means spending time with my daughter.

Sunday, April 22, 2012

Winner of I Love Patchwork Book

My daughter Bea picked the winning name from a bowl this morning after church, but the camera battery needed to be recharged, so we took this photo after bath.

011

Congratulations, Kat!  I have emailed you and the book will be on its way to Australia on Tuesday.

We did a little mom/daughter sewing tonight after the other two went to bed.

012

Today I went to a quilt show at the local senior center.  I think this show was a little unusual as the general public voted each category and even picked the best quilt overall.

002

I had kids with me, so we didn’t stay to see the awards, but my favorite was this quilt.

003

I don’t particularly like the Wizard of Oz, but for some reason I really liked how the two sides looks like film from a reel.  I just thought it was cool.  So I voted for this one, and I let my kids vote for their favorites, too.  We didn’t vote in every category because there were a lot, but we voted for our favorites overall and in the kids’ category.  I wish I could have seen how the public voted because obviously this isn’t the most technical or complicated quilt pattern as some of the others were, but it was stunning.

Thursday, March 22, 2012

Trying New Things Thursday

This week I made my first pouch and inserted my first zipper.

012

It was so easy, that I thought I’d better practice putting in that zipper one more time to make sure I could really do it…and I could!  Introducing Pouch #2…

004

I think I like this one even more.  I only had one zipper long enough to make another, and it was red, so I used a pretty red DS Quilts fabric as the lining this time. 

So, two times is a charm…I can sew a zipper!!!! Yay!

Linking this up to Trying New Things Thursday where Melissa also has a new MBS tutorial.  She is so talented!!!

Thursday, February 23, 2012

Read Across America Dress

001

One of the reasons I wanted to learn to sew was to make my kids’ clothes.  After I bought my first couple of Simplicity and McCalls patterns, though, I put that dream to rest because I had  NO IDEA how to read and follow the patterns.  They were simply too complicated for me!

Then last week when I was volunteering at my daughter’s school, there was an announcement about the Dr. Seuss-inspired Read Across America week and I knew I needed to make Bea an appropriate dress for the celebration.  She’s only in kindergarten and not too old for dresses-made-by-mom yet. 

004

I bought the Reese Peasant Dress pattern on Etsy because it promised lots of photos and many reviewers said it was easy to make.  And it was!   I whipped this dress out in about 2 hours from cutting to finish, and it fits perfectly. 

Last year I traded some DS Quilts fabric on Etsy (probably not officially allowed) for a dress from Wild Olive Kids.  I asked the owner for any advice to learn to sew dresses, and she said to pick a good pattern and practice.  So I picked the Reese pattern specifically for its versatility with sleeves, ruffles, different fabrics, etc.  I am so happy I did!  I also bought two other dress patterns and plan to put them to use when it gets a little warmer out since they are summer styles.

Here is Bea posing next to the dress I traded for.  She hasn’t had a chance to wear the Christmas dress yet because although it’s a size 6, it probably fits more like a size 7 or 8. 

006

I happened to pick up some of that Michael Miller deer fabric on sale after Christmas and hope to make my other girls similar dresses because I didn’t have three daughters for no reason!  I am linking up this dress to Melissa at Happy Quilting’s Trying New Things Thursday.  This project was so much fun and I see lots of dresses in the future, as soon as I learn how to use my serger.

Thursday, February 16, 2012

They grow up so fast

My youngest baby is now 14 months old.  The time passes so quickly.  I have never made too many handmade things for my kids besides quilts.  I have spent hours staring lovingly at all the beautiful items in Anna Maria Horner’s Handmade Beginnings book, but actually making stuff, I’ve never quite gotten around to it.

For Valentine’s, I made everyone in my family a homemade gift.  New hairbows for the older daughters, and white-chocolate-chip-macadamia-nut cookies for the hubby.  But for the youngest, I got off my duff and made her an array of new bibs.

010

She will be wearing them for at least a few more months, and now that she demands to feed herself—which makes an unholy mess—they will get some good use before she’s too big to wear one.

Most of the materials came from my stash (fabric & Velcro) and I bought some really soft pink chenille from Joanns for the back of the bibs.  It wasn’t on sale, but with a 50% off coupon, a yard only cost about $7-8.  The flannel was super cheap—all the pieces were collected by me from the remnant bin that I check out every time I go in to Joanns, which is about once a week.  I found the Velcro in my sewing room stashed in a drawer.  I never used it before, but LOVE it!  There is no separate hook or loop piece.  Instead, the piece sticks to itself, so you don’t have to keep straight what piece you sew where.

011

The owl is my favorite bib.  I made two of these and two from the heart fabric (they were for Valentine’s, after all), so she has eight new bibs total.

012

The little owls have hearts on them!

014

I made two bibs to try out the pattern I drew before I committed to making the rest, and Ronnie wore them several times and they were washed in the washing machine and dried in the dryer, and they came out soft and cuddly and looking good as new.  I was a little worried since all the fabric came from Joanns, but I have a new faith in their flannel and chenille.

With a 1.5 yards of chenille, I was able to make 14 bibs total.  My cousin is having a baby this summer, so six of them will be for her baby if it’s a girl.  If it’s a boy, I’ll be buying some blue chenille!